What Causes Dead Pixels On Projector? 7 Reasons & Guides To Fix This
 Micheal Brown
- 12 Apr 2025 15:43
- 206
The weird black and white dots on the screen will disrupt your movie watching and entertainment experience completely. Their name is dead pixels. To solve this problem, you need to understand nature and its causes. So, what causes dead pixels on projector? Via this article, let's explore with Display Central the causes of this phenomenon more deeply. We also provide you with specific troubleshooting instructions.
What Are Dead Pixels?
Dead pixels are points that appear on the screen when using a projector. You cannot fix this problem with ordinary measures. These dead spots blur the image and affect the viewer's visual experience. There are two common types of dead spots, white and black spots. Both of these points can damage the projector screen and lens.
Black Spots
There are many possible causes of black spots on a projector, both external and internal. The common reason is that dirt sticks to the surface, creating tiny black spots. Their presence makes the movie viewing experience significantly affected.
White Spots
Dead white pixels are more common and have more severe consequences. Despite its small size, its ability to spread is compelling. Images affected by these white points will fade and become unclear. In the long run, they can also damage lenses and projectors.
What Causes Dead Pixels On The Projector?
Now that we've covered the definition of dead spots, it's time to explore what causes this problem.
Dust Issue
Projectors often have an anti-dust filter; however, this air filter still has its flaws. Dirt that accumulates on the filter surface can also get inside the projector. When dirt gets inside the lens, it creates spots on the lens or lamp. You will easily recognize the problem when starting the projector. Fortunately, these points are not dead spots. You can remove it by opening and cleaning the projector. Accumulating dust for too long can also potentially clog the air filter. If this unit is clogged, cool air will not be able to enter the projector. Over time, they will overheat. This phenomenon can also create dead spots after damaging the processor chip.
Smudge
When problems like overheating or projector green tint occur, many people will need to open the projection device for repair. However, if not handled with care, such as bare hands or forgetting to wipe the surface, these contacts can cause streaks. The problem worsens if you expose the projector's DMD chip, lens, and LCD screen. These parts are susceptible to human touch. You can damage the DMD chip and LCD screen with a simple touch of your hand. As a result, some sort of distorted projection or dead spots appear.
Current Overload
Overcurrent currents are also capable of causing electrical damage. The higher the current supplied to the projector, the hotter the device's interior will be. In such cases, cooling fans and vents are almost useless. Even the chip can catch on fire. Burnt pixels will appear on the screen as black dots.
Overheating
Never let the projector temperature get so high that you can't touch it. When overheating occurs, the device's internal components will be damaged and affected. Sometimes, the power supply capacity is not large enough to cool the device. Another cause is a malfunctioning cooling fan. The solution to this problem is to enable the ventilation unit to operate throughout, primarily when the unit has been operating for more than three hours. Otherwise, the high temperature will burn the surface of the LCD screen and the image to stop the device from working. It also burns the thermometer inside. Damage from these parts will result in black spots. Worse yet, you can't get rid of them.
Manufacturing Defect
Some manufacturers may cause installation errors when manufacturing the device. They don't come with the right settings. When first used, the projector worked very well. However, things gradually changed after a few days. You notice tiny black or white dots appearing on the LCD screen. Then they grow and cover the entire surface. If this is the case, please quickly contact the manufacturer to proceed with the return of the goods.
Faulty Video
Many people can also encounter problems like faulty videos. The movie or video you are watching may contain dead spots. One way to check to see if the tape you're watching is problematic is to try playing it on different devices. If you still see these spots appear, then the problem is not with your presentation device. An example of a movie that contains dead spots is Zack Snyder's Army of the dead.
Damaged LCD
Inside the LCD projector is a textured LCD panel similar to the inside of your smartphone. The difference is that the LCD panel in phones is usually covered on one side. Meanwhile, this projector part has a naked design on both sides. Therefore, light passing through the projector light source quickly passes through the LCD panel if it has problems with overheating and dust. When this panel is damaged, you will see stuck pixels appear on the screen. They are red, blue, and green pixels.
Failure Of Pixels
The pixels need to work in sync with each other and obey the input signals. However, when high temperatures enter, the pixels lose their ability to provide optimal image quality in all dimensions. The ugly white and black patches will block all light. Excessive heat clogs the structure and causes components to stop working. Ultimately, this leads to erroneous color mixing and poor image quality. It is extremely popular with gaming projectors.
How To Fix Dead Pixels On Projector?
Now that you know what causes dead patches on your display let's explore the repair methods here. The process will include the following steps:
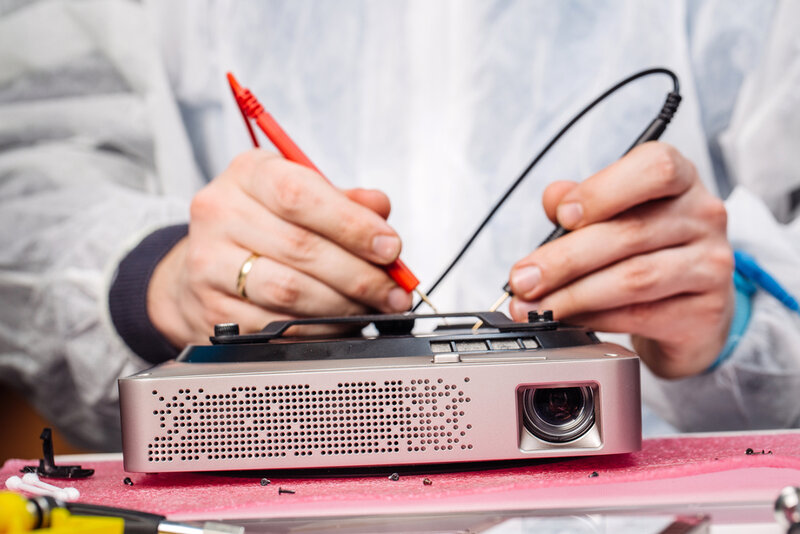
Remove The Top Cover
The first step you need to take is to remove the projector's top cover to access the internal components. Sometimes, the required area will be below the device. Use a screwdriver to remove the connecting screws. Once done, carefully remove the cover and make sure the device is inactive.
Go Behind The Projector
The next step that you need to do is remove all the screws holding the projector port on the back of the projector. This stage is essential to disassemble the main circuit board in the following steps.
Take Apart The Main Circuit
Once you've finished removing the projector cover and the screws on the back, it's time to disassemble the primary circuit. This stage allows you to remove the part of the DMD chip from the device. Let's start by gently removing the screws. Once done, you can quickly take out the DMD chip part. Because you have loosened the screws, rest assured that taking out the DMD chip will not affect the device.
Take The DMD Chip Assembly Out Of The Way
After taking the mainboard out, you can loosen the screws holding the DMD chip assembly. Take it out gently so as not to damage or injure the device.
Clean Or Replace The DMD Chip
After removing the DMD chip, you can choose to clean or replace this part. The final decision will depend on the process of testing your device. The DMD chip test method will require you to disassemble the heatsink at the back of the unit. Of course, you will continue to have to remove the screws. Once you have separated the heatsink and the DMD chip, you can clean them easily with a microfiber cloth.
FAQs
Please find the answers below if you still have any questions regarding projector image projection problems.
Can Dead Pixels Be Permanent?
These patches of dead images, unfortunately, are permanent over time. It signals a weak chip problem and can only get worse. You cannot reverse this process. However, you can try to change the microdisplay chip of your device yourself. If it's a manufacturer's fault, contact them for return policies. Before buying the equipment, you should also check it very carefully.
How Do You Detect Dead Pixels?
If there are strange pixels on your screen that you are sure are not dust, check them carefully. Dead spots are either black or white. At the same time, stuck spots have three colors: red, blue, and green. Even if the images change, these spots will remain fixed and not change color.
How Do You Prevent Dead Pixels?
To prevent dead spots from appearing, you need to care for your projectors and maintain them properly. Please keep them from overheating and being exposed to dirt for a long time.
Can Dead Pixels Spread?
In fact, dead spots do not spread. They are just a tiny error on the screen. If they spread, your device has problems with internal components. In that case, hire a professional to repair or exchange the projector.
How Are Common Dead Pixels?
Unfortunately, dead spots are somewhat common.
Conclusion
What causes dead pixels on projector? There are many causes of dead pixels. It can sometimes be due to subjective factors such as overheating, electrical overload, or dirt. Besides, there are still some objective factors such as faulty videos or manufacturer's installation errors. To properly repair your device, you need to find the cause of the problem. If confused, do not hesitate to seek professional help or the manufacturer. We hope that this guide will help you to fix this situation. Thank you for reading.
By, Micheal BrownMichael Brown has been the lead editor of the website display-central.com for a long time. He's been a technology examiner for almost a decade, specializing in the display solutions such as laptops, projectors, and TVs, and Mobile devices. Michael will provide you with helpful and relevant knowledge and advice based on his technical background.